Shabby Chic Wood Heart Decor
Shabby chichi and antique decor never go out of style. With the correct tools, you can chop-chop and easily create your own cute shabby chic dwelling house decor! You don't need any fancy or expensive supplies to create this pretty shabby chichi decorative centre. Grab your paint and schoolhouse glue, and let's become started.
 View in gallery
  View in gallery
 Supplies Used:
- Unfinished Pallet Mode Wood Eye
- Paint: white, black, pink and lilac
- Schoolhouse glue
- Decorative Scrapbook Paper
- Woods cutouts: "beloved" word and small bird
 View in gallery
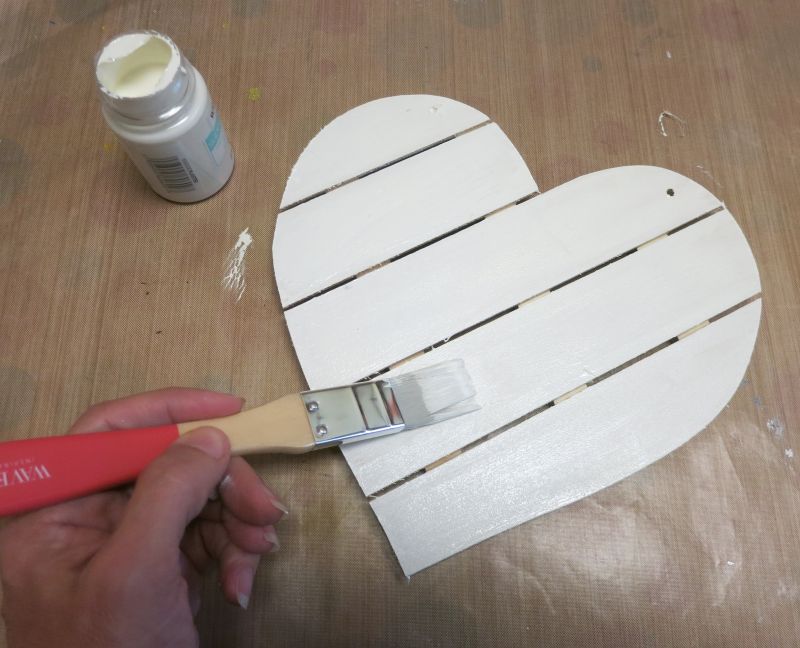
 Step 1: Paint the heart white as a base color. Let it dry.
 View in gallery
 Step two: Trim decorative scrapbook paper to fit ii of the slats on the heart. Distress the edges of the newspaper. I used a Tim Holtz distressing tool to "fray" the edges of the paper.
 View in gallery
 Step three: Brush school mucilage over the white paint on the heart.
Pace 4: Press the paper onto the slats. It's ok if some of the edges coil up…it volition add to the shabby chic appearance of this center.
 View in gallery
 Step 5: Brush the pink and lilac paints over the wet glue. This will dilute the paint and resist the paint in some places, once more to create that shabby vibe. Let the paint dry completely.
 View in gallery
 Pace six: Paint the wood cutouts and let them dry out. I painted the give-and-take "beloved" with black paint the the small woods bird with the aforementioned white pigment that I used equally the base of operations color for the heart.
 View in gallery
 Step seven: Glue the cutouts onto the heart.
 View in gallery
 The wood eye came with a twine string to hang information technology up. I simply tied the twine back on so I can hang my heart. They would make a pretty piece of decor by itself, or it would make a great addition to a photo gallery wall. Yous could also use information technology as a photo prop for wedding or engagement photos! Accept fun crafting and creating shabby chichi decor.
 View in gallery
 Source: https://www.homedit.com/wood-heart-decor/
0 Response to "Shabby Chic Wood Heart Decor"
Post a Comment